This walkthrough demonstrates how to use the CXlOper class to return a 2-dimensional array (vector) from an add-in function.
Three such functions are created, which construct the array result in three different ways:
- From a C++ two-dimensional array class
- From an array of pointers to double
- "By hand", to create an array of mixed type
You can find a copy of all the code used in this walkthrough
in the Walkthroughs/MatrixRes folder in your
XLL+ installation, along with a demonstration spreadsheet,
MatrixRes.xls.
Creating the project
To create the project using Visual Studio .NET or Visual Studio 2005
- From the File menu, select New and then Project to open the New Project dialog.
- Select the XLL+ 6 Excel Add-in project template from the list of Visual C++ Projects, and enter MatrixRes in the Name box. Under Location, enter an appropriate directory in which to create the project.
- Accept all the default settings in the XLL+ AppWizard.
For more information about creating projects, see Creating an add-in project in the XLL+ User Guide.
Returning a numeric array using an array class
Use the XLL+ Function Wizard to create a new add-in function and to add a pair of unsigned short integer arguments.
Note: If you do not know how to start the Function Wizard, or you cannot find the command to open it, look at Invoke the Function Wizard in the User Guide.
-
Open the source file
MatrixRes.cppand click on the New XLL+ Function menu item or tool-button, to show the New Function dialog, and fill in the name as shown below.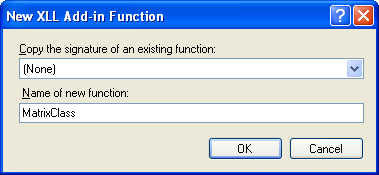
Name MatrixClass Return type CXlOper Category User Defined Description Returns an array of the specified size -
Fill in the function's category and description.
Add two new arguments by typing into the arguments grid, as shown below.
Type Name Description Unsigned Short Int Rows Number of rows to return Unsigned Short Int Columns Number of columns to return 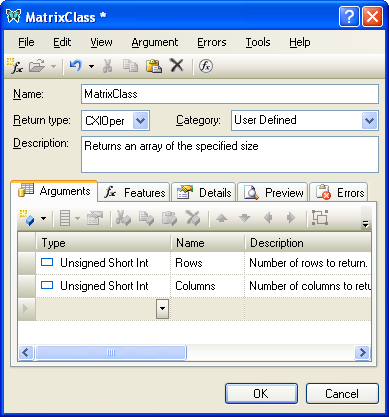
-
Click on the OK button to close the Function Wizard and save the function.
-
The following code has been added to
MatrixRes.cpp. CopyC++
CXlOper* MatrixClass_Impl(CXlOper& xloResult, unsigned short int Rows, unsigned
    short int Columns)
{
    // End of generated code
//}}XLP_SRC
    // TODO - set the value of xloResult, or return another value
    //          using CXlOper::RetXXX() or throw a CXlRuntimeException.
    return xloResult.Ret();
}
-
Add some lines of code to (i) check that the array is not empty, (ii) create a matrix object, (iii) populate it and (iv) return its values to Excel.
CopyC++CXlOper* MatrixClass_Impl(CXlOper& xloResult, unsigned short int Rows, unsigned short int Columns) { // End of generated code //}}XLP_SRC if (Rows == 0 || Columns == 0) throw CXlErrorException(xlerrValue); // Create and populate the matrix object ple::mtx_ptrs<double> m(Rows, Columns); long value = 0; for (USHORT i = 0; i < Rows; i++) for (USHORT j = 0; j < Columns; j++) m[i][j] = (double)++value; // Return it to Excel xloResult = m; return xloResult.Ret(); }
-
The code to return the matrix is very simple:
xloResult = m;This calls one of the many overloads of the CXlOper = operator which simply copies the matrix into the CXlOper.
Returning a numeric array using an array of pointers
Use the XLL+ Function Wizard to create a new add-in function and to add a pair of unsigned short integer arguments.
Note: If you do not know how to start the Function Wizard, or you cannot find the command to open it, look at Invoke the Function Wizard in the User Guide.
-
Open the source file
MatrixRes.cppand click on the New XLL+ Function menu item or tool-button, to show the New Function dialog, and fill in the name as shown below. Instruct the Wizard to copy the signature ofMatrixClass. This will save you having to fill in the rest of the function's specification.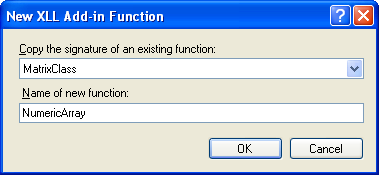
Name NumericArray Return type CXlOper Category User Defined Description Returns an array of the specified size -
The function's category, description and arguments will all be filled in.
Type Name Description Unsigned Short Int Rows Number of rows to return Unsigned Short Int Columns Number of columns to return 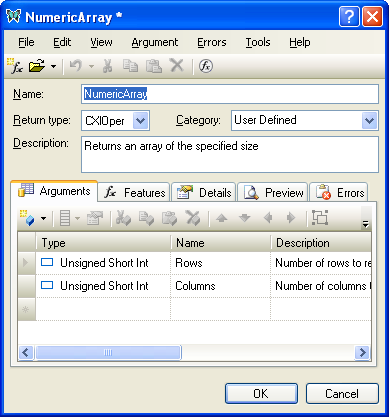
-
Click on the OK button to close the Function Wizard and save the function.
-
The following code has been added to
MatrixRes.cpp.CopyC++CXlOper* NumericArray_Impl(CXlOper& xloResult, unsigned short int Rows, unsigned short int Columns) { // End of generated code //}}XLP_SRC // TODO - set the value of xloResult, or return another value // using CXlOper::RetXXX() or throw a CXlRuntimeException. return xloResult.Ret(); }
-
Add some lines of code to (i) check that the array is not empty, (ii) create a matrix object, (iii) populate it, (iv) return its values to Excel and (v) delete the array.
CopyC++CXlOper* NumericArray_Impl(CXlOper& xloResult, unsigned short int Rows, unsigned short int Columns) { // End of generated code //}}XLP_SRC if (Rows == 0 || Columns == 0) throw CXlErrorException(xlerrValue); // Create and populate the array double** aad = new double*[Rows]; long value = 0; for (USHORT i = 0; i < Rows; i++) { aad[i] = new double[Columns]; for (USHORT j = 0; j < Columns; j++) aad[i][j] = (double)++value; } // Return it to Excel xloResult.FromDoubleArray(aad, Rows, Columns, TRUE); // Delete the array for (USHORT i = 0; i < Rows; i++) delete[] aad[i]; delete[] aad; return xloResult.Ret(); }
-
The important function here is of course FromDoubleArray(). This populates xloResult with a copy of the numeric array aad. The fourth argument to FromDoubleArray(), BOOL bByRows, is set to TRUE, so that the array is laid out with rows representing the continuous data held in each pointer member of aad[]. To transpose the array, set the argument to FALSE. We can then safely delete aad, and return the contents of xloResult.
Returning a mixed array
Use the XLL+ Function Wizard to create a new add-in function and to add an unsigned short integer arguments.
-
Activate the source file MatrixRes.cpp and click on the New XLL+ Function menu item or tool-button, to show the New Function dialog, and fill in the name as shown below.
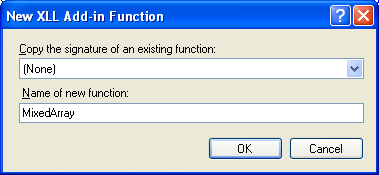
Name MixedArray Return type CXlOper Category User Defined Description Returns an array of mixed types -
Fill in the function's details and add a new argument Rows of type Unsigned Short Int, by typing into the arguments grid, as shown below. Note that the return type must again be CXlOper.
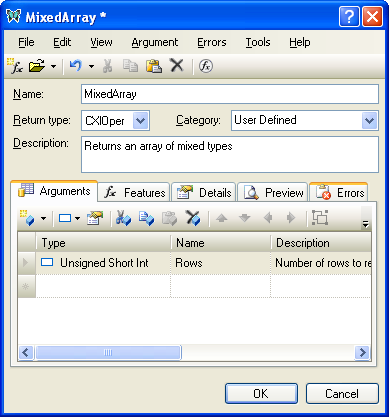
Type Name Description Unsigned Short Int Rows Number of rows to return Click on the OK button to close the Function Wizard and save the function.
-
The following function has been added to MatrixRes.cpp.
CopyC++CXlOper* MixedArray_Impl(CXlOper& xloResult, unsigned short int Rows) { // End of generated code //}}XLP_SRC // TODO - set the value of xloResult, or return another value // using CXlOper::RetXXX() or throw a CXlRuntimeException. return xloResult.Ret(); }
-
Our task is going to be to populate xloResult with a mixed array.
Add the code below to set up a two-dimensional array of cells. Each row of cells contains a number and a string.
CopyC++CXlOper* MixedArray_Impl(CXlOper& xloResult, unsigned short int Rows) { // End of generated code //}}XLP_SRC if (Rows == 0) throw CXlErrorException(xlerrValue); xloResult.AllocArray(Rows, 2); for (USHORT i = 0; i < Rows; i++) { xloResult.Cell(i, 0) = (double)i; xloResult.Cell(i, 1) = "A string"; } return xloResult.Ret(); }
First we test that Rows is non-zero, and fail if it is not.
Then we use AllocArray() to turn xloResult into an array with Rows rows and 2 columns.
Next, we populate each row of xloResult, using the Cell() method to access each cell.
Finally we return the contents of xloResult to Excel, as usual.
Testing the add-in
- Build the project, using the Build/Build Solution menu or Shift+Ctrl+B keyboard short-cut.
- When the project has been built successfully, use the Debug/Start Debugging menu or F5 keyboard short-cut to run your add-in under Excel.
- If Excel puts up any message boxes asking whether you trust the add-in, say yes.
-
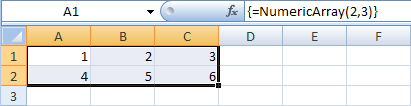
In a worksheet, select a range containing two rows and three columns, and type in the formula
=NumericArray(2,3), as shown below.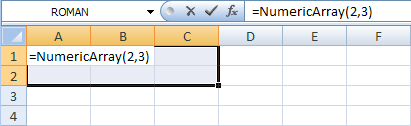
Then press the key combination Shift+Ctrl+Enter to enter the formula as an array formula.
See Also
CXlOper::FromDoubleArray method | CXlOper::AllocArray method | CXlOper::Cell method | Samples and Walkthroughs