
HOW TO: Upgrade a project to run in 64-bit Excel
Reference: Q0064
Article last modified on 16-Apr-2019
The information in this article applies to:
- XLL+ for Visual Studio 2005 - 7.0
- XLL+ for Visual Studio 2008 - 7.0
- XLL+ for Visual Studio 2010 - 7.0
- XLL+ for Visual Studio 2012 - 7.0
- XLL+ for Visual Studio 2013 - 7.0
- XLL+ for Visual Studio 2015 - 7.0
- XLL+ for Visual Studio 2017 - 7.0
What is the procedure to upgrade a project to work with 64-bit Excel?
Issue
I built an XLL+ project which works with a 32-bit version of Excel. I now wish to upgrade it to work with 64-bit versions of Excel. What is the procedure?
Summary
-
By default, when you create a new XLL Plus project, the XLL+ AppWizard creates both a 32-bit build and a 64-bit build.
-
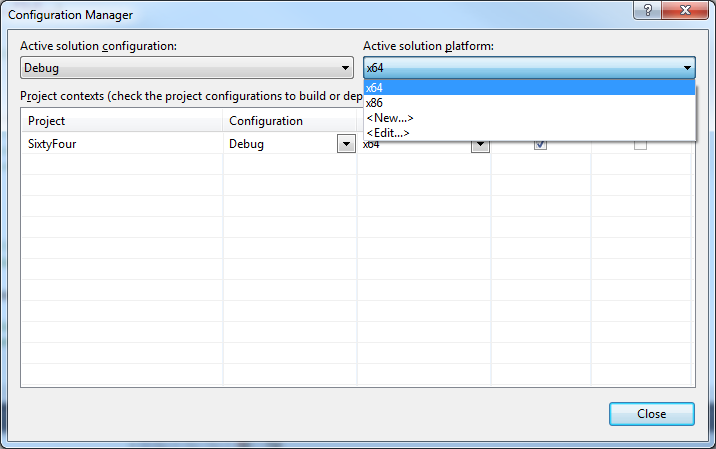
If your project contains a 64-bit build, then use Build > Configuration Manager... to open the dialog and set the Active solution platform to be x64.
-
If you cannot find the 64-bit build in this project see Create a new project below.
Procedure
To build a 64-bit version of the project correctly, follow the steps below.
-
Use Build > Configuration Manager... to open the dialog and set the Active solution platform to be x64.
-
If x64 does not appear in the list, then follow the steps in Create a new project below.
-
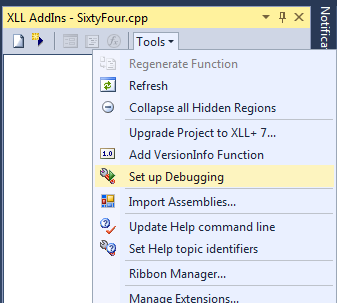
Build the 64-bit configuration, and then press F5 to debug and run the add-in. If Excel does not start, use the XLL AddIns > Tools > Set up Debugging command to set the command line.
-
When Excel starts, check that it is a 64-bit version. See INFO: How can I tell whether I am running an Excel 32-bit or 64-bit version? for details. If you have a 64-bit version of Excel installed on your computer, but it is not the version that is starting, use the XLL AddIns > Tools > XLL+ Options... command to show the XLL Plus General Options. Ensure that Project / DefaultExcelExe is pointing to the correct 64-bit version of Excel.

If you encounter any other problems please contact our support staff via email.
Create a new project
If your existing project does not already contain a 64-bit build, the easiest solution is usually to create a new project that does contain the 64-bit build.
-
Make sure that the new project is in a different location from the existing project, but ensure that it has the same name.
-
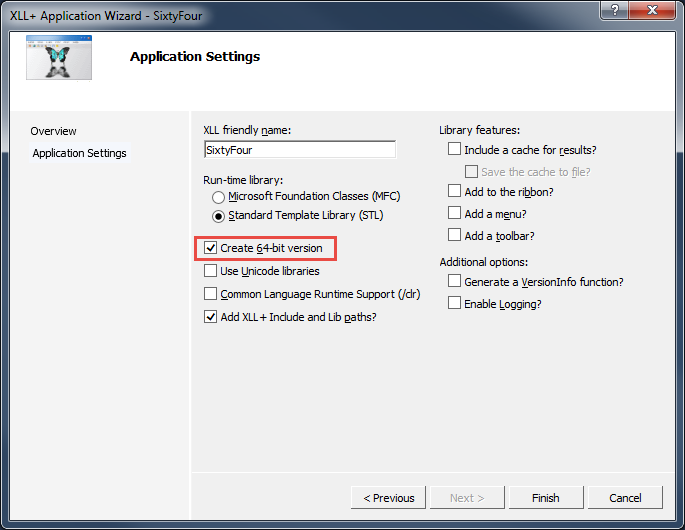
When you create the project with the XLL Plus AppWizard, be sure to leave the Create 64-bit version checkbox checked.
-
Copy the source files from your existing project across to the new project folder. For each file that is not already part of the new project, use Add > Existing Item... (Shift+Alt+A) in the Solution Explorer \ to add it to the appropriate folder within the project.
-
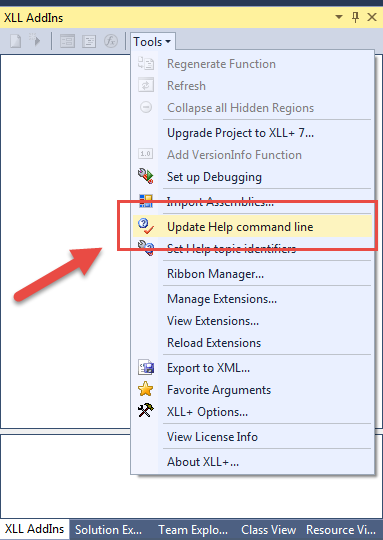
When you have finished adding files to the new project, be sure to use the Update Help Command Line command to upgrade your help file settings.
-
Build and test your new project, and ensure that the 64-bit build builds successfully.