
Installing XLL+ 5
Note: These instructions are for XLL+ 5.0. For XLL+ 6.0 and above, please see Installing XLL+ 6.
Uninstall previous versions
Upgrade licenses
Rebuild all projects
Uninstall previous versions
If you have any other version of XLL+ installed on your computer, you must uninstall it before installing your new version. Among the versions you might need to uninstall are:
- XLL+ 4.2
- XLL+ 4.3
- Trial versions of XLL+
- Versions of XLL+ for different or fewer platforms
The simplest way to uninstall is to use the Start programs menu item:
Start/Programs/XLL+/Tools/Uninstall or Reinstall XLL+
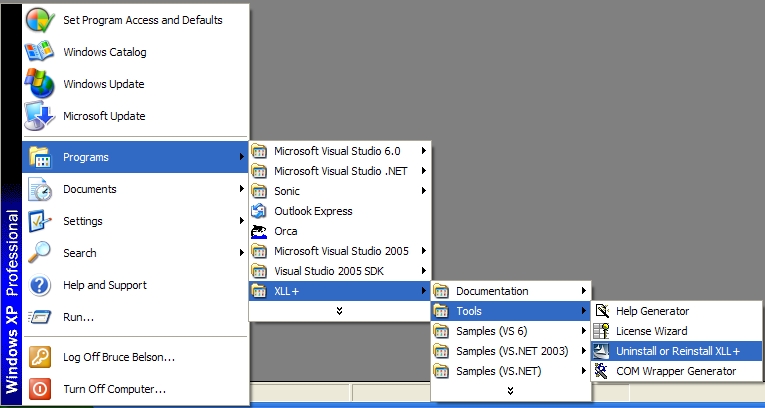
If your XLL+ menu has been damaged or deleted, then follow the instructions in FAQ #0025.
Upgrade licenses
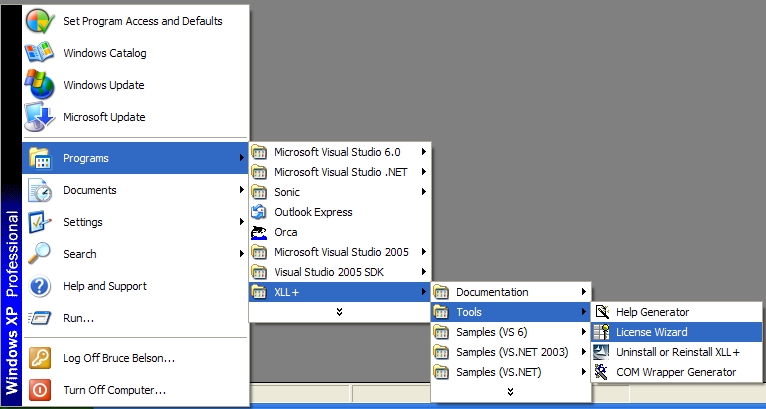
If you bought an upgrade license for XLL+ 5.0, then you should install it immediately after installing your new version of XLL+, using the steps below:
-
Start the XLL+ License Wizard (on the Start/Programs/XLL+/Tools menu).
-
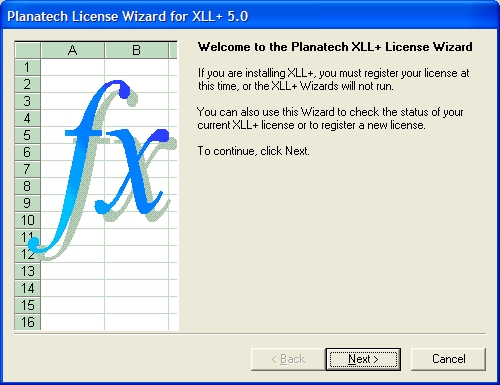
On the "Welcome" screen, press "Next".
-
On the "Select License Type" screen, select "Upgrade" and press "Next".

-
On the "Fixed License Details" screen, your existing license (not your new upgrade license) may already be present in the list of current licenses, as shown below.
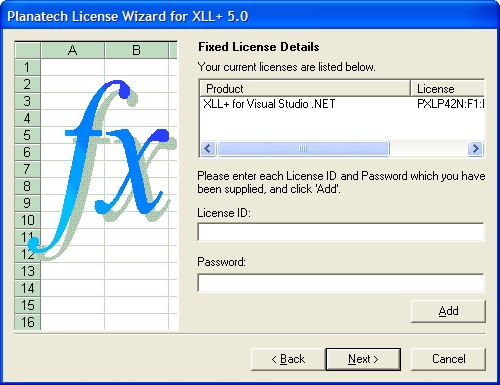
If it is aleady present, skip to step 7.
-
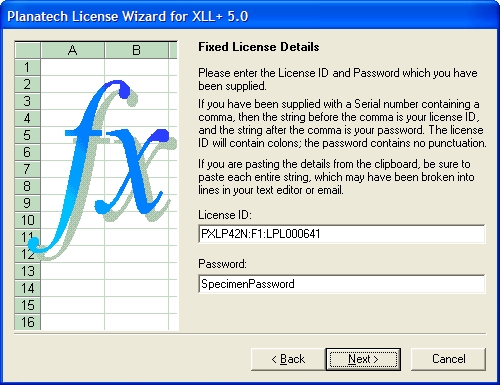
If your old license is not visible, enter it in the "License ID" and "Password" fields, and press "Next".
- On the "Ready to save license settings" page, press "Back".
-
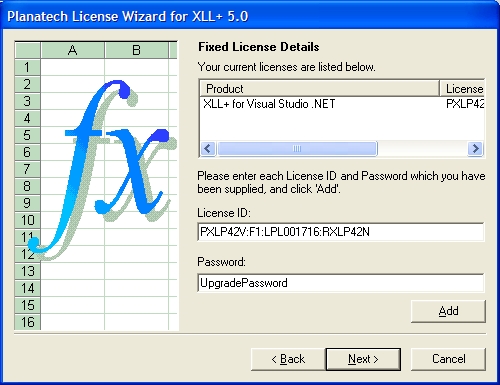
On the "Fixed License Details" screen, enter your new upgrade license in the "License ID" and "Password" fields, and press "Add".
-
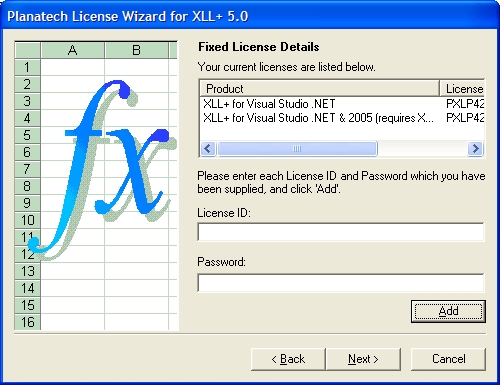
On the "Fixed License Details" screen, both your licenses should now be visible
in the current licenses list. Press "Next" to continue.
-
On the final page, press "Finish" to save your changes.
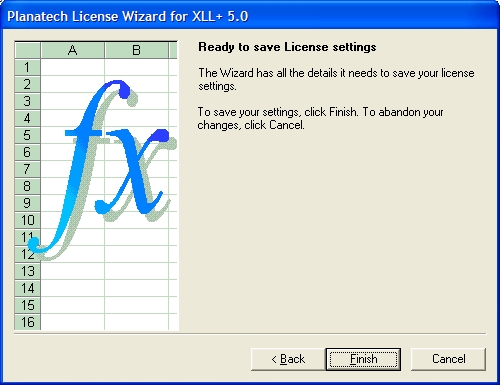
Your upgrade license is now installed, and you are ready to start using your new version of XLL+.
Rebuild all projects
It is essential that you completely rebuild all projects built with previous versions of XLL+, particularly projects built with a trial version of XLL+.
XLLs built with the trial version of XLL+ use the trial version XLL+ run-time libraries. These XLLs will stop running 30 days after they are first opened on a particular machine. So, if you have distributed any XLLs built with the trial version to users, you must rebuild them and deliver the new licensed version of the XLL.
In Visual Studio 6, open the project and use the Build/Rebuild All menu for both the Debug and the Release configurations.
In Visual Studio .NET, .NET 2003 and 2005, open the solution and use the Build/Rebuild Solution menu for both the Debug and the Release configurations.