
HOW TO: Upgrade a project to Visual Studio 2015
Reference: Q0063
Article last modified on 6-Sep-2017
The information in this article applies to:
- XLL+ for Visual Studio 2005 - 7.0
- XLL+ for Visual Studio 2008 - 7.0
- XLL+ for Visual Studio 2010 - 7.0
- XLL+ for Visual Studio 2012 - 7.0
- XLL+ for Visual Studio 2013 - 7.0
- XLL+ for Visual Studio 2015 - 7.0
What is the procedure to upgrade a project to Visual Studio 2015 from an earlier version of Visual Studio?
Issue
I built an XLL+ project using an older version of Visual Studio. I now wish to upgrade it Visual Studio 2015. I am seeing some strange errors when I build the project.
Summary
-
The XLL Plus Upgrade Project tool will upgrade most or all of your project settings. You can find it in the XLL Add-ins Window, under the Tools menu.
-
You may can use the Update Help Command Line command to upgrade your help file settings, if you are using any Extended Types
Procedure
To convert the project to build correctly, follow the steps below.
-
If necessary, ensure that all files can be written to, for instance by checking them out of a source control system. The files that may be changed include all source files (
*.hand*.cpp) and project and solution files (*.vcxproj,*.vcxproj.filters,*.sln). -
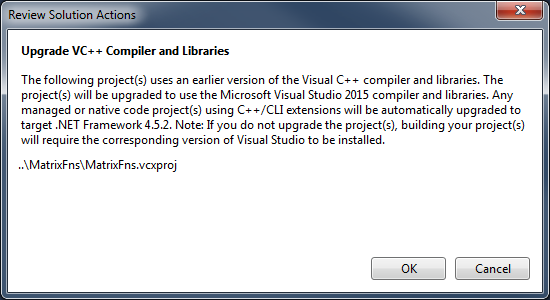
Open the solution in Visual Studio 2015. If you are prompted to upgrade the to use the Microsoft 2015 compiler and libraries, click OK.
-
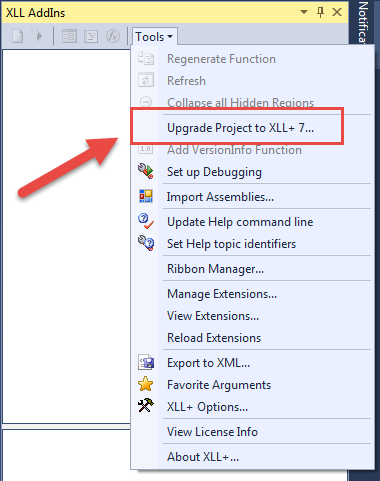
If necessary, open the XLL Add-ins Window. Under the Tools menu, click the Upgrade Project to XLL+ 7... command.
-
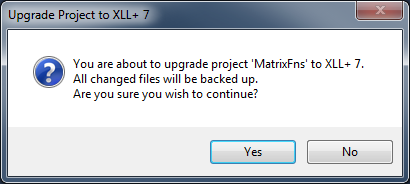
In the confirmation dialog, select Yes.
-
Once the conversion has completed, you will be presented with an upgrade report. Note that all the changed files are backed up to a newly created backup folder. (The backup folder also holds the upgrade report
UpgradeReport.html.) If any problems occurred, they will be listed here.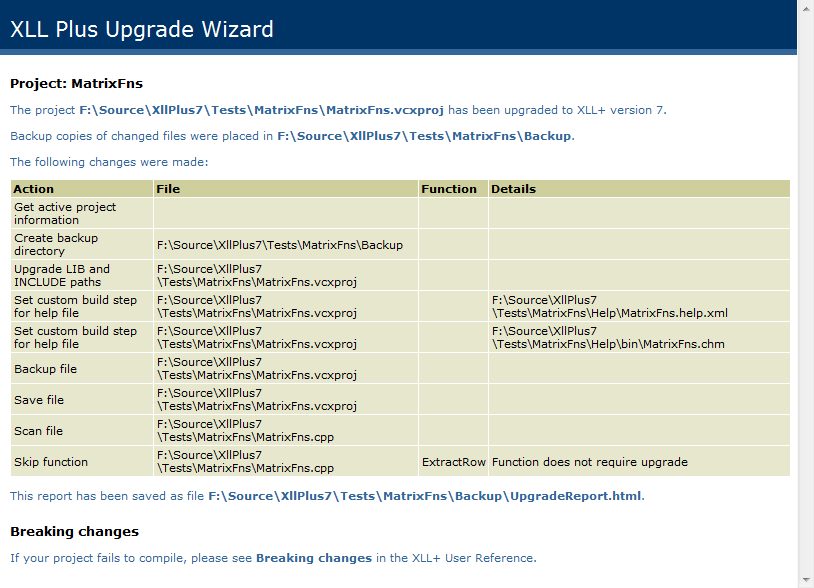
-
If your solution contains multiple projects, return to the Solution Explorer tool window and open any
.cppsource file that belongs to the XLL+ add-in project. -
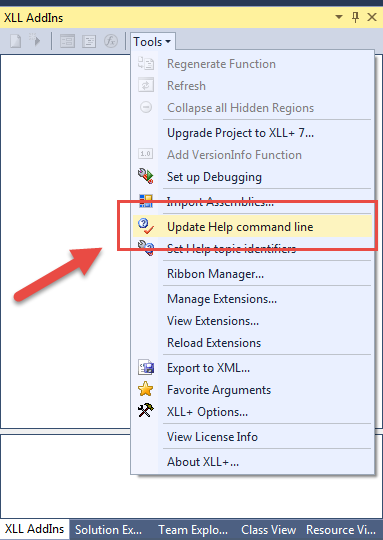
In the XLL Add-ins tool window, under the Tools menu, click the Upgrade Help command line command.
-
Build your project. If any errors occur, close the project, and reopen the project file
[MyProject].vcxprojusing a text editor.In the project file, search for any instances of the old toolkit paths
$(XlpNNNInstallDir7)(e.g.$(Xlp100InstallDir7)for Visual Studio 2010) and replace them with the new path:$(Xlp140InstallDir7). Save your changes, reopen the solution, and rebuild (using the Build > Rebuild Solution command in Visual Studio).
If you encounter any other problems please contact our support staff via email.