The model file is an XML file which contains details of the signatures of add-in functions, along with the help text for functions and their arguments.
You should never make changes by hand to the model file, since it will be overwritten each time it is exported.
The Wizard creates an empty model file when the wrapper project is created; it is the developer's responsibility to update it.
 Saving a model file for an XLL+ project
A model file can be generated from an XLL+ project by using the "Tools/Export to XML…" command in the XLL Add-ins window.
The model file should be saved as [XllProjectName].model.xml (where [XllProjectName] is the name of the C++ project containing the add-in functions), in the directory containing the COM wrapper project, overwriting the existing file.
Updating the model file
-
Open a C++ source file from the XLL+ Add-in project.
-
Activate the XLL Add-ins window. If it is not currently visible, use the menu command View/Other Windows/XLL Add-ins Window to display it.
-
Click the Set Help topic identifiers command in the Tools menu of the XLL Add-ins window.
-
Click the Export to XML... command in the Tools menu of the XLL Add-ins window.
-
In the Export to XML window, click on the browse (...) button in the Save As panel.
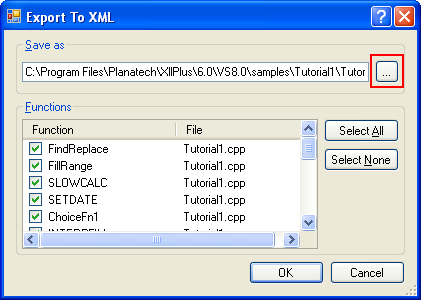
Navigate to the wrapper project directory and save the file as [WrapperProjectName].model.xml (substituting the correct wrapper project name); click Yes when you are asked whether you want to replace the existing file.
-
In the Export to XML window, press OK to generate the model file.
After the file is saved, you will be asked whether you want to open the file. Unless you are interested in inspecting the XML file at this point, click No.
-
You should repeat this process whenever you add a new add-in function to the Excel add-in, or change the signature of an existing function.
The wrapper project is now complete. You can now build and test the wrapper library.
Creating a model file for an XLL from any other source
Model files can also be generated for XLL's from other sources, by using the XLLQUERY command-line tool.